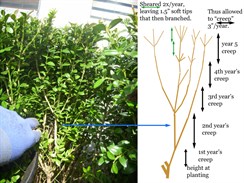
Boxwood is cut per standard restriction pruning
procedure. In short, that's::
• Cut the whole plant to a size that is shorter and narrower
than the goal by one year's growth.
• Also cut some of the branches back by an additional year or
two. Try with these deeper cuts to remove the thickest branches,
those that are older and have been cut at the same level for so
long that they are basically bare wood with a twiggy top-knot.
Make this cut each year before budbreak in spring or in August
after the year's growth is set. That way you can prune just once
each year and also enjoy the bright spring green of the boxwood
rather than cutting it off in its glory.
Same for relaxed and formal look
We follow this same pruning method whether we keep the hedge
tightly geometric or allow it to assume a more relaxed version of
its natural shape (Buxus x sempervirens 'Green Gem' is a
mound, 'Green Mountain' is a columnar variety, etc.) The difference
in the cut is in the line we draw and cut to. It's either exact or
more approximate.
We might, emphasis on might, nip stray tips a month or
so after the main pruning if we want a very tight shape. However,
we do not and experienced gardeners with long term results in mind
do not repeatedly shear new growth.
In this article we show you three boxwood hedges:
• The first hedge is formal: tight and
geometric. On it we show you all the steps of restriction pruning,
just as we apply them to it each year.
• The second hedge is of plants kept in
their natural habit (mounded variety 'Winter Gem') but are
pruned to remain a foot or so shorter than they would be if left
alone.
• The third hedge is a rescue: It's a
formal boxwood hedge that we took in hand after it had crept out of
control.
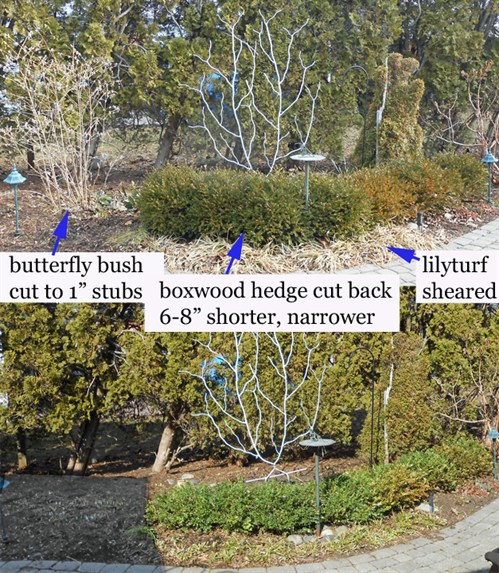
Boxwood hedge, restriction
pruning
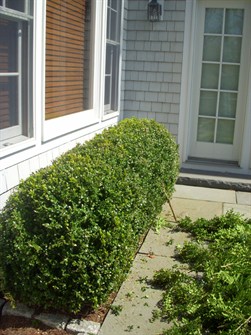
Below: One November we noticed that these 5-year old
boxwoods had become too big, rounded in outline and were near
see-through in their middles. Looking inside the hedge, the
branching told us the shrubs had been repeatedly sheared but no
thinning cuts were being made. We noted our file to take over
pruning the next spring.
Below, left: The next spring, looking inside the plant we
see it had become very dense at the top and sides because shearing
during active growth had encouraged branching there. This thicket
at the outer edge blocked light from the interior, so greenery
there had died. The hedge was becoming a hollow ball.
To help you see what we're doing, we'll thin first and then shear
(this reverses the standard restriction pruning steps; that change
in sequence is okay.)
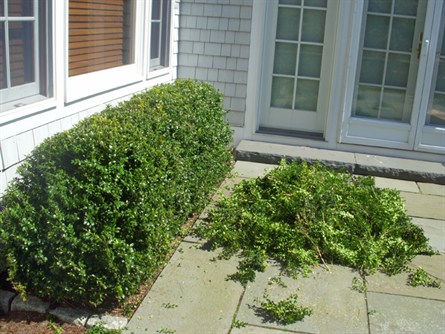
Below, right: There, all thinned. All pieces we removed are
on the ground.
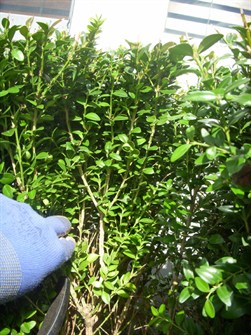
Right: In thinning we clip out about 1 of every 5 stems,
reaching down to cut below the heavily branched segments. For more
explanation of thinning, and to help you see what we saw in this
shrub's branching, a click will enlarge this photo with
explanatory graphics.
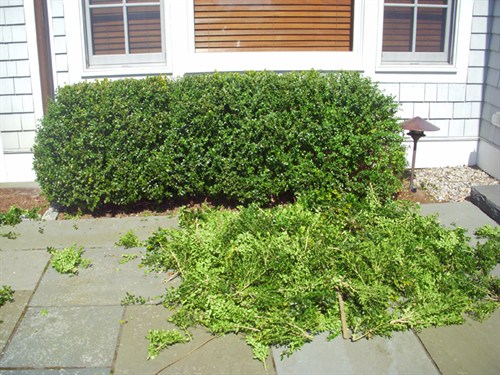
Above: Now as we shear we correct the bulge that was
developing where there should have been a slope from base to top of
hedge. (Compare before, left to after, right. You may need
to notice the edge of the shrub in relation to the door in the
background, to appreciate the change.)
Below: It may seem we tax a plant too heavily by
removing so much as we prune but repeated shearing takes a heavier
toll by continually removing all new foliage. In 3 or 4 shearings
over the course of a season as much or more foliage is removed as
we took in one cut. In addition, since repeated shearing makes the
plant woodier and concentrates the foliage at the outer edge, every
cut removes a much greater portion of the foliage.
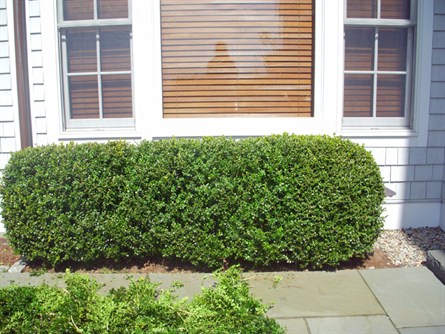
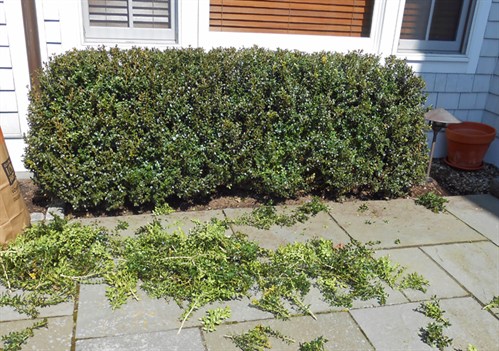
Below: One year later, early spring, and we've once
again made the thinning cuts. All that remains is to shear the
plant to bring it down below the windowsill, as before. Despite all
this cutting, it is denser and more green than when we stepped in
to change the pruning routine from all-shearing.
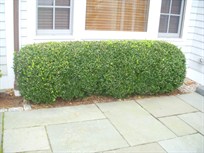
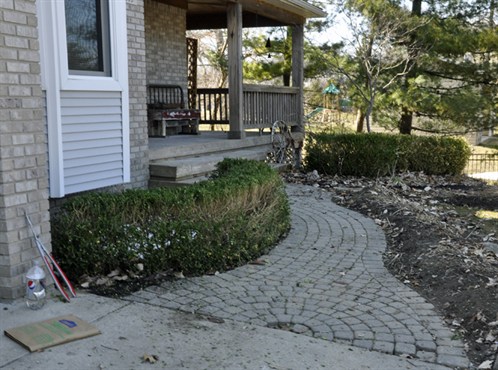
Boxwood hedge, informal
outline, restriction pruning
Before and after the steps shown above have been taken. We prune
this hedge every two years.
Boxwood hedge, rescued and
being brought back in line
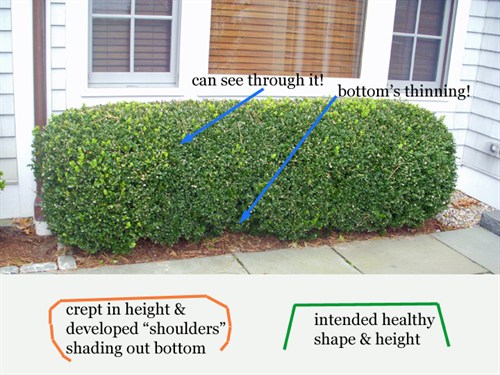
This is a formal boxwood hedge that we took in hand after it had
crept out of control, developing "shoulders." Shoulders widen the
whole hedge while shading the base so growth at the base thinned.
We pruned as described above, sloping inward and also removing dead
wood. There is a gap but it will fill pretty quickly from what is
still lively wood in the interior.
A second boxwood hedge in the background had less lively wood
because it's more shaded by trees and had also been pummeled
regularly by an embedded sprinkler head. We thinned that hedge to
let light reach and rejuvenate the interior wood and will put the
sprinkler on a riser to stop the damage. Once the plant is stronger
we'll cut it back farther.
On any plant pruned small and expected to be uniformly dense,
it's important to narrow the "shoulders." Make the sides slant in
to the top or they will shade the bottom and it will thin there.
How much should you slant the sides? Enough that if you were a tiny
person standing right at the base of the hedge, you could still see
the top of the plant.